Making Baby Food: Part 4
Posted On: 2010-03-25
Making baby food is quite a task but it is well worth it. Writing about how to make it is a little tricky because there is so much information to relay. I have decided to do a blog entry every day this week featuring an aspect of making baby food from what you need, to easy to make mistakes. Hopefully by the end of the week you will feel confident in making healthy, cost effective, and fast baby food!
Part 3: Making the baby food!
If you haven't already done so, please read Part 1, Part 2, and Part 3 as well as this blog before making your first baby food. Trust me, it will be a big help! I will be referring to Part 1's tools in this blog but elaborating on what I do and why. Along the way there will be practical points and that is where I learned something in the process that is important to know and/or do.
 Step 1: Clean and peel the fruit/vegetable. Using a colander is an easy way to clean foods and let the dirt come off without accidentally dropping your food in the sink. Use a mixing bowl to put your washed and peeled fruits/vegetables in while you finish all the washing and peeling.
Practical Point: Always clean your fruits/vegetables EVEN IF you are going to peel them.
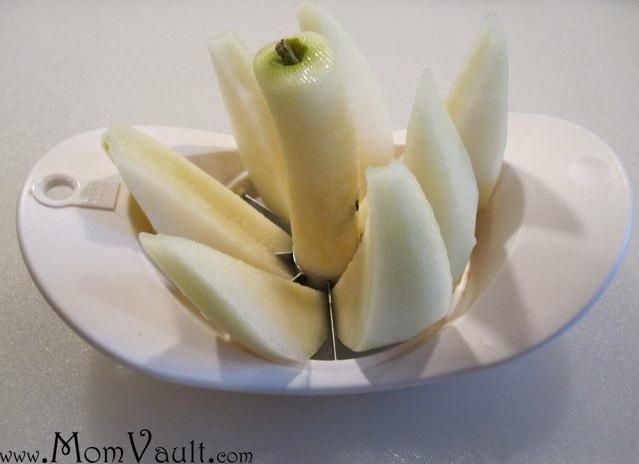
 Step 2: Cut and core your fruits/vegetables. Use a knife appropriate for the food and always take safety precautions. The apple core in the picture above makes it easy to remove the core and slice the fruit at the same time! It will also work on pears! Use a large cutting board so you have an area for scraps that don't look good and still have enough room to cut all the food you have waiting.
 Practical Point: If you have never cut a yam or sweet potato, you are in for a surprise because they are very stiff. Choose the long skinny ones instead of the short fat ones. Also, make sure there are no soft spots.
 Step 3: Prepare the cooking sauce and cook. You can be as creative as you want to be with this part. I will be posting several recipes I use for apples, sweet potatoes, and carrots in Making Baby Food: Part 5. There are also plenty of recipes and suggestions online so explore and see what sounds good to you. Once you have your liquid, spices, and seasonings in the pressure cooker, stir and add the cut up fruit/vegetables.
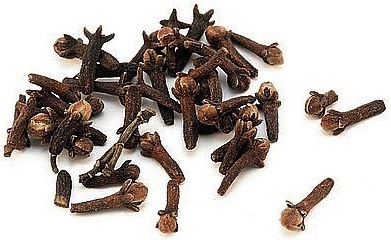
Practical Point: Count the amount of whole spices you put in so you know how many to take out. I routinely use whole all spice and whole cloves in my recipes.
Pressure Cooker: Refer to your pressure cooker manual for appropriate amounts of liquid and cooking instructions. Mine requires a minimum of 2 and 1/2 cups of liquid for the first 15 minutes, additional 1 cup for every 15 minutes after that. Note: Not even hard sweet potatoes need to go for longer than 11 minutes in a pressure cooker. Pressure cooking is scary at first but most units come with several different safeguards to prevent what you might think can happen (like exploding). Start the cooking timer only once  the pressure cooker begins to hiss.
Practical Point: You can also bake or boil the fruits/vegetables if you do not have or don't feel comfortable with a pressure cooker. For me, it has turned out to be the best and fastest solution.
 Step 4: Drain and sort the food. Place the colander inside a mixing bowl to catch the excess fluid. Then, using a spoon carefully spoon portions of the fruit/vegetable into a separate mixing bowl once you know there are not any whole spices stuck to them. Continue this until you have successfully counted and removed all of the whole spices. Allow food to cool off for a few minutes, but not too long because we don't want it to get contaminated with anything!
Practical Point: Consider reusing the liquid from your first food for the foods coming after it. This will save time, money, and make a delicious combination. I recently pressure cooked apples and then reused the liquid and whole spices for sweet potatoes, I even made pears after that using the same liquid.
 Step 5: Puree and Freeze. I highly recommend that you invest in a food processor (one that also has a blender attachment is a bonus)! The devices made specifically for baby food making have much too small of a container for holding the processed food. Use the chop setting first to cut up the large chunks and gradually increase it to the highest speed for 30-60seconds. Also, add in some of the excess liquid you kept from Step 4 to make the food thinner. Use a rubber spatula to clean out the last of the baby food from the container and scoop it into an ice cube tray. Cover with saran wrap and freeze. Once the food is frozen, store in a freezer safe tupperware or gallon zip loc bag.
Practical Point: A food processor works best when the food content does not exceed 60% of the container capacity so keep that in mind when you are looking for your device.
See MV Store for all products discussed on MomVault!
Read Making Baby Food: Part 1
Read Making Baby Food: Part 2
Read Making Baby Food: Part 3
Read Making Baby Food: Part 5